Every website, online business, and digital brand starts with a domain name. Behind every domain lies a wealth of information that can reveal ownership details, registration history, technical infrastructure, security indicators, and potential risks.
This is where WHOIS becomes one of the most valuable intelligence tools available to security professionals, business analysts, investigators, marketers, and researchers.
WHOIS is basically a publicly accessible query protocol, a database system that helps you find owners and contact information and also some technical details.
While many people use it simply to check whether a domain is available, modern domain intelligence goes far beyond basic registration details. These data can help uncover fraudulent websites, track competitors, identify domain ownership, monitor expiration dates, and support cybersecurity investigations.
In this comprehensive guide, you’ll learn how to use this utility, what information it reveals, how to conduct professional domain research, and how organizations use WHOIS data for business intelligence and security analysis.
What Is Domain WHOIS?
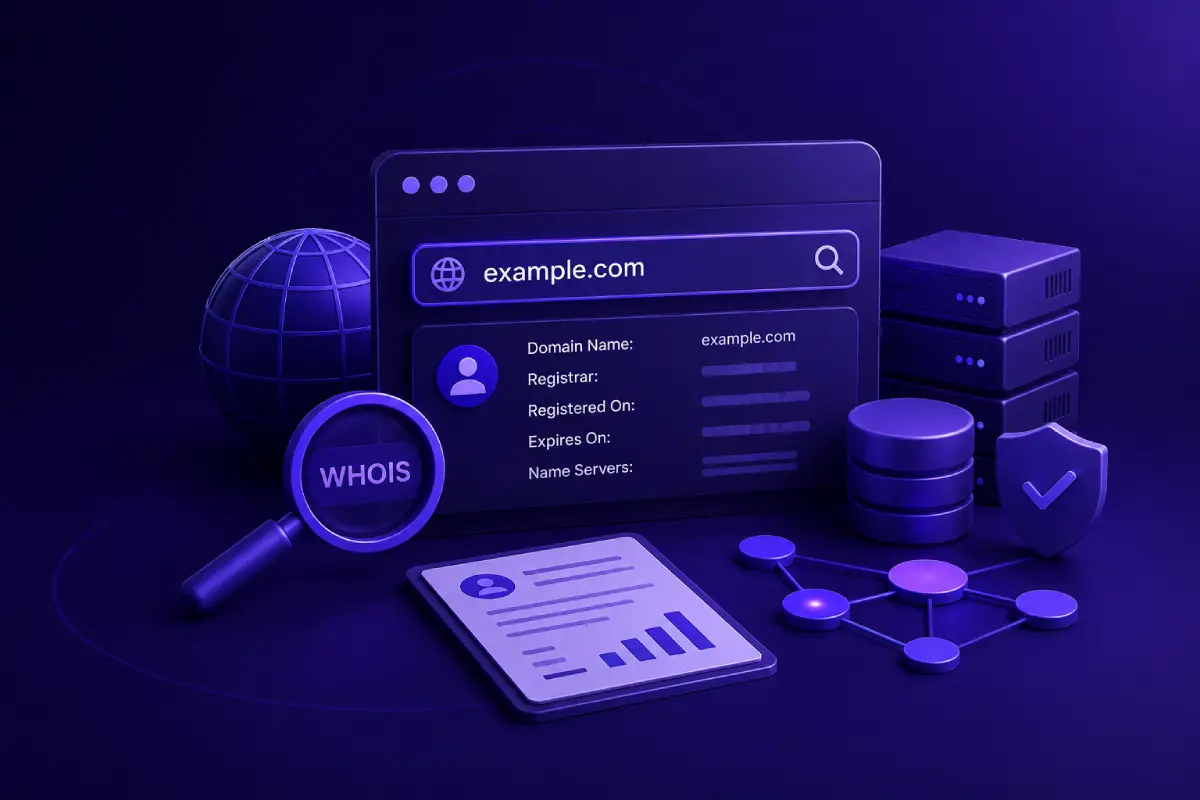
WHOIS is a public database system that stores registration information about internet domain names.
When someone registers a domain through a registrar, ICANN (Internet Corporation for Assigned Names and Numbers) requires registrars to collect some information like contact details, name, address, organization, phone number, associated IP block and more. Originally, this system was designed to help sys admins or network administrators to troubleshoot their network, find and contact domain owners more easily.
However, since it can expose private data, modern regulations like GDPR, made most registrars to redact personal information. So nowadays, information you get is not as verbose as it used to be. Now you mostly see technical data such as registrar, nameservers, registration or expiration date.
These records are accessible through WHOIS lookup services and contain data related to:
- Domain ownership
- Registration dates
- Expiration dates
- Domain registrar
- Nameservers
- Administrative contacts
- Technical contacts
- Registration status
WHOIS serves as a transparency mechanism for the domain ecosystem, helping organizations identify who is responsible for a particular domain and when it was registered.
Why WHOIS Matters in Domain Intelligence
Domain intelligence involves gathering information about domains to assess legitimacy, ownership, infrastructure, and risk.
WHOIS is often the first source analysts consult because it provides foundational information about a domain.
Here are some of the professional that use these databases the most:
- Cybersecurity Experts & Threat Actors
- Digital Forensic & Incident Responders (DFIR)
- Law Enforcement & Forensic investigators
- Trademark Attorneys
- Brand Protection Firms & Specialists
- IT & Systems Administrators
- M&A Advisors
- Compliance Officers
- Also people that use it for OSINT purposes, like Investigate journalists
Common use cases among these groups include:
Ownership Verification
Businesses frequently need to confirm who owns a domain before:
- Purchasing a website
- Negotiating acquisitions
- Resolving trademark disputes
- Investigating suspicious activity
WHOIS records provide important clues about domain ownership and registration history.
Security Investigations
Cybersecurity teams use security related data to investigate:
- Phishing websites
- Malware campaigns
- Fake login portals
- Brand impersonation attacks
- Fraudulent online stores
- Technical Information like IP block (this alone is really important and WHOIS data is not the only way to find it)
Registration patterns often reveal connections between multiple malicious domains.
Competitive Research
Marketing and business teams analyze records to:
- Monitor competitor domains
- Discover new brand launches
- Track regional expansion efforts
- Identify domain acquisition strategies
Asset Management
Large organizations may own hundreds or thousands of domains.
WHOIS helps monitor:
- Expiration dates
- Registrar changes
- Ownership records
- Domain portfolio health
What Information Does a WHOIS Record Contain?
The exact information varies by registry and domain extension, but a typical record includes several key components. These days WHOIS is more technical oriented database rather than a place to find personal or contact data. In most cases even the contact details are not the owner’s, it’s for the registrar instead.
Domain Name
The registered domain itself.
Example:
example.com
This confirms the exact asset being researched.
Registrar Information
The registrar is the company responsible for processing the domain registration.
Examples include:
- entity[“company”,“GoDaddy”,“Domain registrar”]
- entity[“company”,“Namecheap”,“Domain registrar”]
- entity[“company”,“Tucows”,“Domain registrar”]
- entity[“company”,“Network Solutions”,“Domain registrar”]
Knowing the registrar can assist during investigations or domain transfer processes.
Registration Date
This field shows when the domain was originally registered.
Example:
Creation Date:
2018-05-10
Creation date is extremely useful for penetration testers, bug bounty hunters and security experts in general. Older a domain is, chance is higher to find outdated components, older code bases, forgotten features and more corners which might give away important aspects of the infrastructure of that company.
On the other hand, if a domain is newly registered, it is a good indicator that there might be a new feature there, something that has not been well tested by others, therefore there is a high chance of finding a vulnerability. Bounty hunters often look for places that others have missed or overlooked, this makes them win the race.
Older domains often indicate established websites, while newly registered domains may require additional scrutiny.
Expiration Date
This indicates when the domain registration is scheduled to expire.
Organizations use this information to avoid accidental domain loss.
Updated Date
Shows the most recent modification to the domain registration record. In OSINT or Recon process, this can be a good signal that not only something has changed about the domain, but more importantly, some other things are about to become different than before. Like if ownership transfers, web application might get some new updates or go through a whole new business model path, don’t you think?
Recent updates can indicate:
- Ownership transfers
- Registrar changes
- Contact updates
- Security modifications
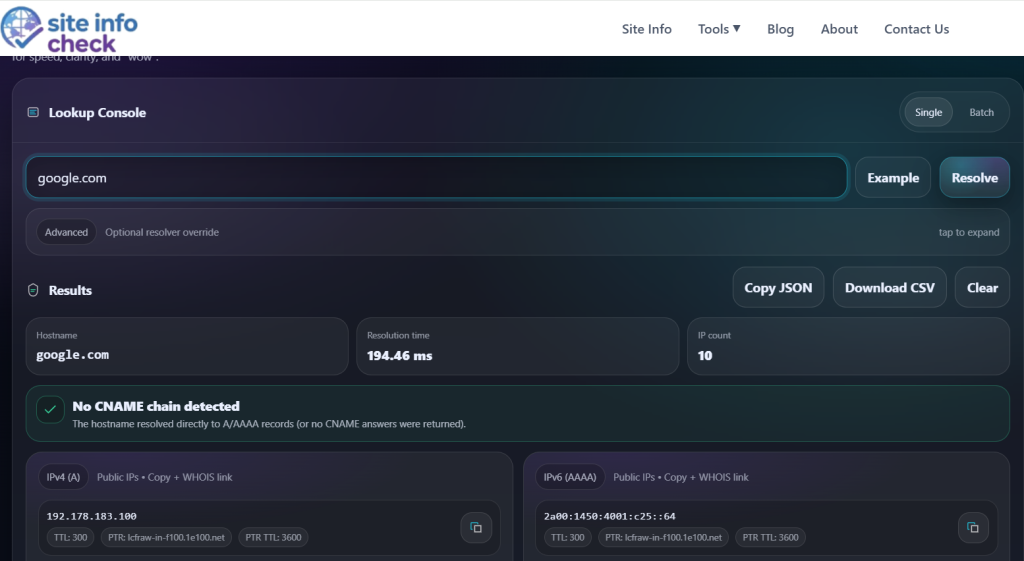
Nameservers
WHOIS records typically list authoritative nameservers.
Example:
ns1.provider.com
ns2.provider.com
Nameservers reveal which DNS infrastructure manages the domain. Some companies, mainly well-known and big scale ones, have their own nameservers specially for their highly protected environments. These servers can be leaked in WHOIS data which might lead to finding new domains or subdomains of that company that could not have been found before.
Registration Status Codes
Status codes provide important operational information.
Examples include:
- clientTransferProhibited
- clientUpdateProhibited
- serverHold
- pendingDelete
These codes can indicate whether a domain is active, locked, suspended, or pending deletion.
Understanding WHOIS Privacy Protection
Historically, records displayed personal information such as:
- Owner name
- Email address
- Phone number
- Physical address
Privacy concerns led to major changes in accessibility.
Today many registrars offer:
Privacy Protection Services
Registrant information is replaced with proxy details.
Benefits include:
- Reduced spam
- Improved privacy
- Protection against harassment
- Lower risk of social engineering (but technical risks remain the same)
GDPR and Modern WHOIS
The implementation of GDPR significantly reduced the amount of publicly visible personal data in WHOIS databases.
As a result, many records now display:
REDACTED FOR PRIVACY
instead of personal details.
This limits direct ownership identification but still leaves substantial technical and registration parts available for analysis.
How Security Teams Use WHOIS Data
WHOIS remains a powerful cybersecurity intelligence source.
Identifying Phishing Domains
Attackers often register domains that imitate legitimate brands for social engineering or phishing attacks.
Examples:
- paypaI-security.com
- micr0soft-login.com
- amaz0n-support.net
WHOIS analysis helps identify:
- Recent registrations
- Suspicious registrars
- Registration clusters (a registration cluster is a set of domain names that are linked to each other because they share the same registrant)
- Shared infrastructure
Investigating Malware Campaigns
Threat actors commonly register multiple domains simultaneously.
Analysts compare:
- Registration dates
- Nameservers
- Registrars
- Historical ownership data
Patterns often reveal entire malicious infrastructures.
Tracking Threat Actors
Even when privacy protection is enabled, attackers frequently reuse:
- Nameservers
- Hosting providers
- Registration timing
- Technical configurations
Using WHOIS for Fraud Detection
Online fraud continues to grow, making domain investigation increasingly important. Domain related details will not easily tell us if a domain used for phishing or spreading malware, instead it gives us signs that might be helpers to identify possible fraud, especially for agencies that do fraud detection on scale using automated scanner. No scanner, at least often, can identify fraud that easily, but understanding these signs, can show investigation starting points.
Warning Sign #1: Recently Registered Domain
Many fraudulent websites appear shortly before launching scams.
Check:
- Creation date
- Registration age
- Domain history
A website claiming decades of experience but registered last week deserves scrutiny.
Warning Sign #2: Short Registration Period
Scammers often register domains for only one year.
Legitimate businesses frequently secure domains for multiple years.
Warning Sign #3: Hidden Infrastructure Patterns
Fraud networks may share:
- Nameservers
- Registrars
- DNS providers
Cross-referencing records can expose related domains.
Warning Sign #4: Frequent Ownership Changes
Repeated transfers can signal suspicious activity.
Ownership changes should always be evaluated in context.
Competitive Intelligence Through WHOIS Research
WHOIS can provide valuable business insights. From security aspects, this is one of the most important use cases of it. A big organization might have hundreds of domain and thousands of subdomains. Let’s say by looking up WHOIS content of one of their domains, we find one of their email addresses that was used to register that domain.
Now if you feed that email to a reverse WHOIS (name calls itself, it’s literally the other way around) tool, you can find a list of domains that share the same registrar email. This can lead us to more domains or acquisitions of that company which will increase attack surface significantly.
Discover New Product Launches
Companies often register domains before public announcements.
Monitoring domain registrations can reveal:
- Upcoming services
- New products
- Marketing campaigns
- Geographic expansion plans
Monitor Brand Protection Efforts
Organizations register multiple variations of their brand names to prevent abuse.
Researchers can identify:
- Defensive registrations
- Trademark protection strategies
- Regional branding initiatives
Analyze Competitor Infrastructure
Records may reveal:
- Registrar preferences
- DNS providers
- Domain portfolio size
- Management practices
These insights help benchmark operational maturity.
Domain Expiry Intelligence
Domain expiration tracking is one of the most practical uses of WHOIS.
Why Expiry Dates Matter
Expired domains can cause:
- Website outages
- Email failures
- Revenue loss
- Brand damage
Many organizations have experienced significant disruptions after forgetting to renew critical domains. It’s one of the reasons companies have automated monitoring systems for any service that might need renewal like SSL certificates or domains.
Monitoring Critical Assets
Businesses should maintain a list of:
- Primary domains
- Secondary domains
- Marketing campaign domains
- Defensive registrations
Regular checks help ensure no asset approaches expiration unnoticed.
Expired Domain Opportunities
Researchers and investors often monitor expiring domains because they may offer:
- Existing backlinks
- Brand recognition
- Historical authority
- Valuable keywords
Proper due diligence remains essential before acquisition.
WHOIS vs Domain Intelligence Tools
WHOIS provides foundational information, but modern domain intelligence platforms offer additional capabilities.
Advanced tools may include:
- Historical WHOIS records
- DNS history
- Hosting history
- SSL certificate tracking
- IP intelligence
- Risk scoring
- Reputation monitoring
Combining multiple intelligence sources produces far more accurate assessments than one method alone.
Limitations of WHOIS Research
Despite its usefulness, WHOIS has several limitations.
Privacy Redactions
Many records no longer reveal registrant details.
Incomplete Data
Different registries publish different information.
False Registration Information
Some registrants provide inaccurate data.
Shared Infrastructure
Multiple unrelated domains may use the same providers, creating misleading associations.
WHOIS should always be combined with additional intelligence sources.
Best Practices for Professional Domain Investigation
WHOIS alone is not efficient in most cases. For example, when you find the IP block (CIDR) through it, it creates an opportunity to find ASN numbers, more IPs, therefore more domains, subdomains and services, but IP block itself was just a start.
To maximize research accuracy:
Verify Multiple Data Sources
Combine WHOIS with:
- DNS lookups
- SSL certificate analysis
- IP intelligence
- Website content review
Check Historical Records
Historical records databases can reveal:
- Previous owners
- Registrar changes
- Ownership transfers
Monitor Changes Over Time
Single snapshots provide limited context.
Ongoing monitoring often reveals meaningful patterns. Watching for change, is always beneficial.
Evaluate the Entire Ecosystem
Investigate:
- Related domains
- Nameservers
- Hosting infrastructure
- SSL certificates
Looking at the broader ecosystem produces more reliable conclusions.
Essential WHOIS Research Workflow
A professional investigation typically follows these steps:
Step 1: Perform WHOIS Lookup
Gather registration information.
Step 2: Review Registration Dates
Assess domain age and history.
Step 3: Examine Nameservers
Identify DNS infrastructure.
Step 4: Analyze Registrar Data
Determine registration provider and patterns.
Step 5: Check Expiration Information
Evaluate asset stability.
Step 6: Correlate Additional Intelligence
Combine findings with DNS, SSL, and IP data.
Step 7: Document Findings
Maintain records for future reference and comparison.
Conclusion
So in summary, WHOIS is just a tool like many others that we use for our own good. For many reasons, it’s irreplaceable, the data it holds is not easily found elsewhere.
It remains one of the most important tools for domain intelligence and internet research. Whether you’re conducting cybersecurity investigations, verifying ownership, monitoring competitors, tracking domain expiration dates, or identifying fraud, WHOIS data provides critical insights into the digital assets that power the modern web.
Although privacy regulations have changed the amount of publicly visible information available, WHOIS continues to offer valuable technical and registration data that can support business decisions, security operations, and investigative research.
When combined with DNS analysis, IP intelligence, historical records, and infrastructure monitoring, WHOIS becomes an indispensable component of a comprehensive domain intelligence strategy.
Start Your Domain Research Today
Need to investigate a domain, verify ownership details, or monitor registration information?
Start your domain research with our comprehensive Domain Info tool and gain deeper visibility into domain ownership, registration history, DNS configuration, expiration tracking, and infrastructure intelligence.
Related Resources
- Domain Info Tool
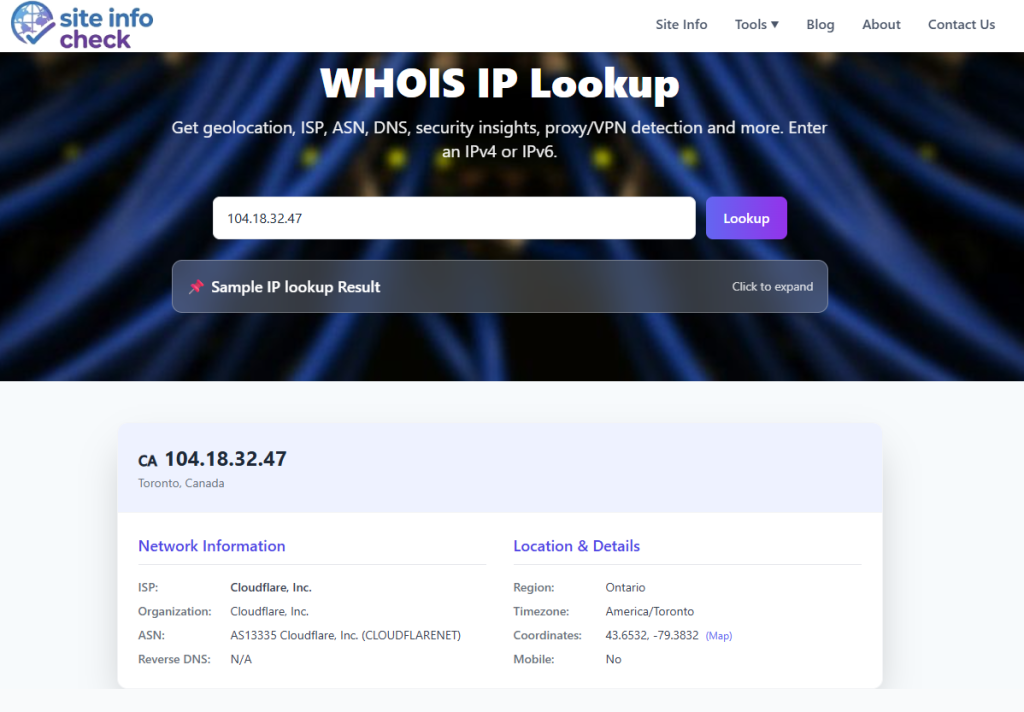
- WHOIS IP Tool
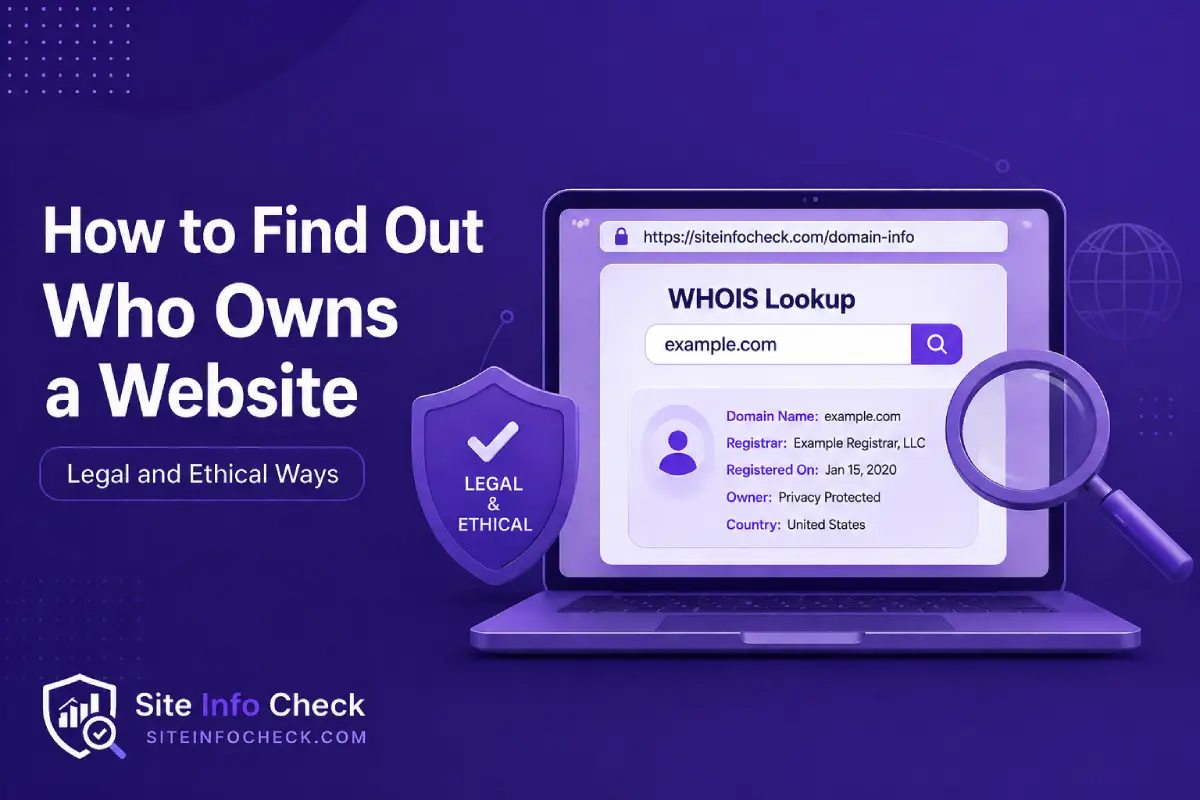
- How to Find Out Who Owns a Website
- WHOIS Lookup Explained: What Data You Can (and Can’t) Find